Tuesday 28 June 2011

David and Miné's Wedding - 2011-06-18

Hi everyone,

On Saturday 18 June I attended the wedding of my good friends David and Miné in Cape Town. The ceremony was at St. Georges Cathedral, which is spectacular, and the reception was held at Kelvin Grove. The professional photo shoot was in the city around the cathedral, which made for some fantastic images.

It was a beautiful wedding, full of happiness and a lot of memorable moments.
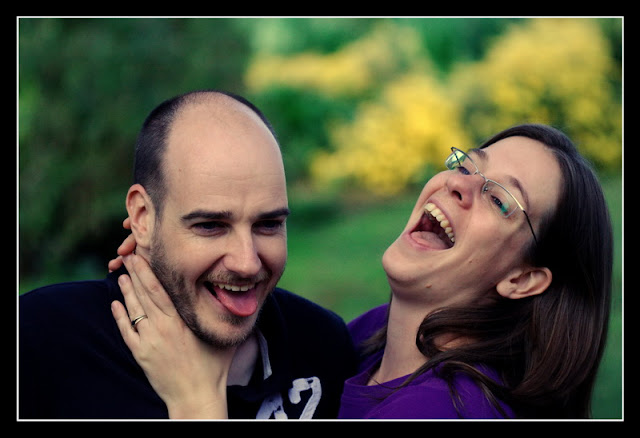
The Happy Couple
I wasn’t the official photographer for the day so I tried to stay out of his way as much as possible (I did have some serious lens envy though, he was shooting with a 5D MKII, 24-70 f2.8 and 70-200 f2.8, plus soft box and matching beautiful assistant). I was a groomsman, which meant that I was present for the groom’s preparation and got a few photos that he didn’t.

I spent most of the day shooting with my 50mm f1.8 once again. The reason this time being that I was doing a lot of indoor shooting and didn’t want to distract people with a flash. My 50mm is a very hard working little lens that has served me well over the years. Unfortunately the focus mechanism is getting a little warn and I’m starting to miss shots because of it… hmmm, might be time to upgrade to the 50mm f1.4…

Congratulations to David and Miné. I wish you all that is good in your life together.

The complete gallery can be found here.

The Groom Preparing
Last Minute Speech Writing
Austin 16/6 - The Getaway Car
Detail of Miné's Dress 
Epic Android Wedding Cake
The Dixie Swingers playing after the ceremony

Saturday 25 June 2011

Photo Glossary - 08 - Focus Locking

Most cameras give us the option of locking the focus before composing a photo.  This is usually done by pressing the shutter button in half way, holding it in place while you compose and then pushing it in fully to take the photo. 
Suppose that you wanted maximum control of your photograph and had set your camera to focus on the object in the centre of the frame, rather than focussing intelligently.  If you were taking a photo of two people with a small gap between them the camera would focus through the gap on what ever was behind them.  They would be out of focus and the background in focus.  With focus lock you can point the camera at one of the people, push the button in half way as you compose the  photo to include both of them and then push the button all the way in to take the photo.

Monday 20 June 2011

Photo Glossary - 07 - Depth of Field

Objects that are not on the focal plane (i.e. closer to or further away from the camera than the focal point is) will always be out of focus.  The further away from the focal plane an object is, the more out of focus it will be.  Objects close to the focal plane will appear to be in focus for the purposes of the photograph.  The distance from the closest object that appears to be in focus to the furthest object that appears to be in focus is called the depth of field.
There are three factors that affect the depth of field of a photograph:
 1.       Aperture of the lens – a large aperture will produce a shallow depth of field and a small aperture will produce a deep depth of field.
 2.       Focal Length of the lens – a long lens (zoomed in) will produce a shallow depth of field while a wide lens (zoomed out) will produce a deep depth of field.
 3.       Distance to the Focal Plane – Focussing close to the camera will produce a shallow depth of field, while focussing far from the camera will produce a deep depth of field.

A deep depth of field is useful when you want to capture an entire scene, for example in landscape photography.  A shallow depth of field is useful when you want to draw attention to your subject only, for example in portrait or wildlife photography.

Additional Info
Although the following doesn’t strictly change the depth of field, it allows you to get the most out of the depth of field that you do have.  Strictly speaking, depth of field is a measure of what distance an object can be from the focal point while remaining in focus.  What we really see when we look at a photo however is the apparent depth of field, which is influenced more by the difference between the sharpest and softest areas of the photo, than the actual, technical depth of field.
  
The secret to manipulating the apparent depth of field is in controlling the distances from your camera to your subject and from your camera to the background.  In fact it’s the ratio between the two distances that matters.
  
In order to get an apparently shallow depth of field put your subject close to the camera with the background far behind it.  The bigger the ratio between the distances, the more out of focus the background will be and the shallower the apparent depth of field.  The narrowest depth of field can be obtained by focussing on either the closest or furthest object in the photo.

In order to get an apparently deep depth of field put your subject far from your camera and close to the background.  The smaller the ratio between the distances the less out of focus the background will be and the deeper the apparent depth of field.

The widest depth of field can generally be obtained by focussing at about 2/3 of the distance between your camera and the furthest object in the photo. 
Monday 13 June 2011

Photo Glossary - 06 - Focal Point/Focal Plane

Focal Point
Focal point has two meanings in photography.
Optical Focal Point is the point of the photo that is in sharpest focus.
Artistic Focal Point is a point of concentration in the photograph that draws the attention of the viewer.
It is quite common for the two focal points to be on the same point in the photograph, for instance the eye or a bird, the centre of a flower or the face of a person in a portrait.

Focal Plane
The focal plane is an imaginary plane that passes through the optical focal point of a lens.  What that means is that everything that is the same distance away from the camera as the optical focal point will also be in focus.  Everything closer to the camera and everything further from the camera will be out of focus.  The degree to which they are out of focus is called the depth of field.
Note:The camera’s sensor is placed on a second focal plane inside the camera, sometimes called the sensor plane.  

Saturday 11 June 2011

Photo Glossary - 05 - White Balance

White balance is a setting on most digital cameras that allows the photographer to compensate for colour casts caused by different lighting conditions. All light has a dominant colour. That is not to say that it contains only that colour (such as the light from a red traffic light) but rather that it contains more of that colour than other colours. In general natural light is cool and results in photos with a blue tint, while artificial light is warm and results in photos with a yellow tint. These tints are most noticeable on white objects.
In automatic mode white balance is controlled by the camera.

Thursday 9 June 2011

Natal Midlands - Easter 2011

Over the 2011 Easter weekend I went down to the Natal Midlands with my wife's family and a few friends. It is a very beautiful part of the country and we all enjoyed some time to relax and unwind.

I used my walk about lens, the Sigma 18-200, for most of the shots. It doesn't have the quality of my other lenses but it make up for that with its extreme versatility. I also used my 100mm macro for some of the portraits and detail work.

For the most part post processing was simple levels/colour balance, sharpening and cropping. A few of the portraits proved quite difficult since the back ground was considerably lighter than the subject. The full gallery can be found here.
Glengarry Mountain at Sunrise
Sterling Wrought Iron
Goat at the Cheese Factory
Sibling Love
Giant Wind Chimes
Chandelier Detail

Wednesday 8 June 2011

Photo Glossary - 04 - ISO Setting

The ISO setting on a camera changes the sensitivity of the sensor. It is equivalent to film speed in analogue cameras. A low ISO setting requires a lot of light to get the correct exposure and is useful for shooting in bright conditions like a beach on a sunny day. A high ISO setting requires very little light to get the correct exposure and is useful for low light situations where you can’t use a flash, like inside a church. A high ISO setting comes at a price though, as it degrades the image quality. Firstly it creates a lot of noise, giving the photo a grainy feel. Secondly it looses colour information, resulting in a low contrast image.
In automatic mode the ISO setting is controlled by the camera.

Thursday 2 June 2011

Photo Glossary - 03 - Aperture

The aperture is a variable opening in the lens that controls the amount of light that reaches your camera’s sensor in a given time. .  It, in conjunction with the shutter speed and ISO setting, determines the exposure of the photo.  Given a consistent shutter speed and ISO setting a narrow aperture will let in less light and a wide aperture more light.

In addition the aperture affects the amount of the photo that is in focus, called the depth of field.  With a wide aperture only objects close to the focal point will be in focus (shallow depth of field) while with a narrow aperture objects further away from the focal point will be in focus (deep depth of field).

In automatic mode the aperture is controlled by the camera.